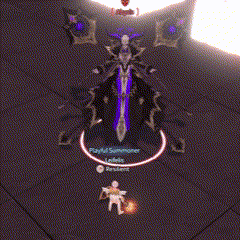
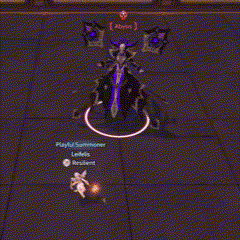
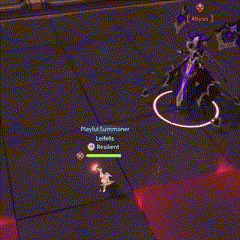
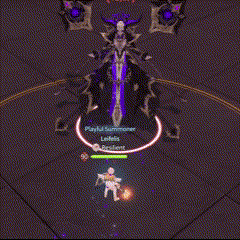
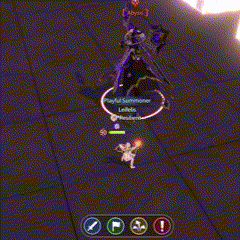
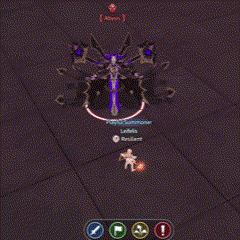
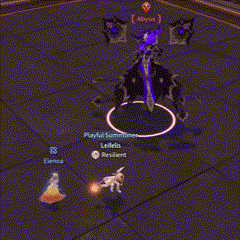
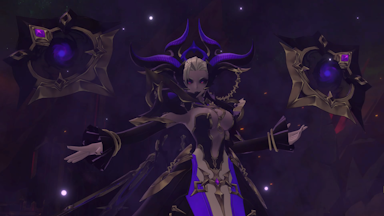
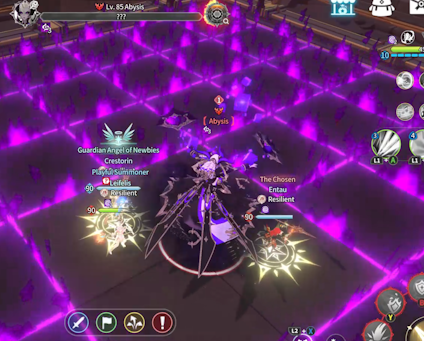
Abysis is the boss in the first mythic raid, Abyss Lord’s Asylum. To unlock it, a Summoner must complete the following quest in Sierra > Secret Feeding Ground map:
- • Rahil Guard Summoners – Act 9 Chapter 2: While Being Away
- • Heath – Act 9 Chapter 4: Mission Start
946,000+ PWR is required for bonus, which is highly recommended. As with other raids, a Summoner can enter with their strongest Monsters for the bonus, then swap to the proper Monsters once inside while maintaining the bonus.
Table of Contents
Section 1: NOT Recommended Summoner Elements / Monsters
Section 2: Recommended Monsters
Section 3: Example Team Compositions
Section 4: Abysis’ Usual Skills
Section 5: Fighting Abysis
Phase 1: Meteor
Phase 2: Shield
Phase 3: Darkness
Phase 4: Meteor 2
(Final) Phase 5: Radiance Spear
Section 1: NOT Recommended Summoner Elements / Monsters
First, let’s start with what is NOT recommended (to narrow down available Monsters based on your summons).
Due to Abysis’ passive skills, Summoner / Monster skills with the following effects will be impacted:
*Note: the list of Monsters below is non exhaustive; please refer to the Monster Book in-game for other Monsters with these effects.
DMG based on no. of harmful effects:
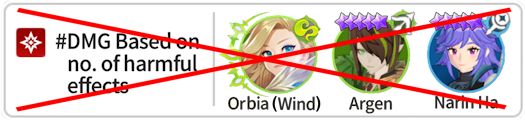
- • For every hit with this effect, Lv. 1 Abyss (unremovable debuff) is applied.
- • For Wind Orbia, only Skill 1: Wild Bolt is impacted.
- • More on this debuff in Section 4: Abysis’ Usual Skills > Debuff: Abyss below.
DMG Mitigation Ignoring DMG:

- • For every hit with this effect, Lv. 1 Abyss (unremovable debuff) is applied.
- • For Light Soleta, both Skill 1: Light Focus Shot and Skill 2: Light Pierce are impacted.
- • More on this debuff in Section 4: Abysis’ Usual Skills > Debuff: Abyss below.
Ultimate Gauge UP:
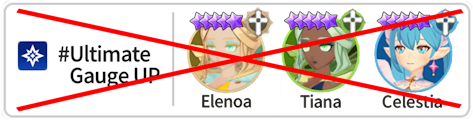
- • When a skill with this effect is used, Abysis will use Black Hole, which pulls constantly and makes dodging several times harder.
- • More on this skill in section Abysis’ Usual Skills > Dark Storm & Black Hole below.
Section 2: Recommended Monsters
Must-Have:
MOV SPD UP:

• Why: To make dodging significantly easier, as Abysis’ skill range is large.
• How many: 1 per party.
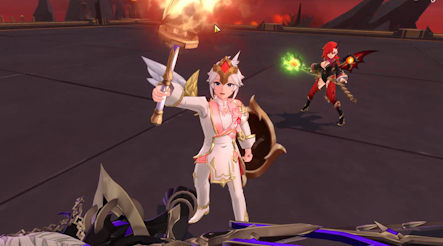
Fire Sky Dancer (Hwahee):
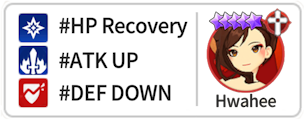
• Why: A healer with buffs/debuffs that increase overall damage.
• How many: At least 1 per party (recommended 2).
Fire Polar Queen (Brandia):
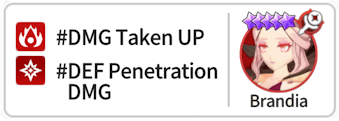
• Why: She is one of the best damage dealer for this raid, as her DMG Taken UP (a.k.a. brand) debuff increases overall damage.
• How many: At least 1 per party (recommended 2). You could even bring 3 if you’d like!
Other Damage Dealers:
If there is already at least 1 Brandia in the party, other damage dealers can be used as well. Without the usual damage dealers like Argen and Perna, the next best ones are those that have damage that scales or DEF penetration.
Here are some examples to get you started:


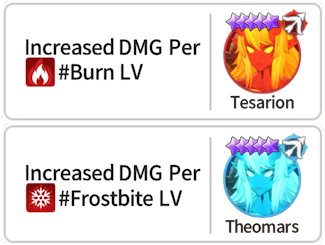

There are other viable damage dealers aside from these, so do some trial and error to see which suits you best!
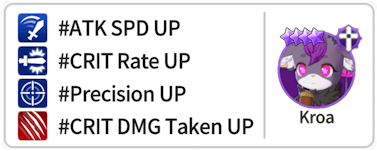
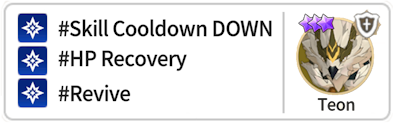
Buffers / Debuffers:
Damage is often a bottleneck in this raid, particularly in Phase 2: Shield, thus buffs/debuffs that increase overall damage are preferred.


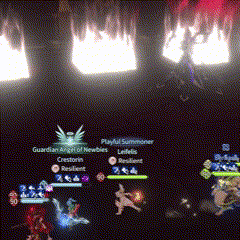
Section 3: Example Team Compositions
There are endless team compositions possible that it's impossible to list them all, and I recommend trying out different compositions to suit your and your party members' playstyle best. For reference, however, I've listed the team compositions that I've had successful runs with:
Team #1:
- Damage dealer + healer:
- • Soletta (Water) + Rosario + Hwahee + Brandia
- • Orbia (Fire) + Teon + Hwahee + Brandia
- Buffer + Runner:
- • Cleaf (Fire) + Remy + Windy + Gourry
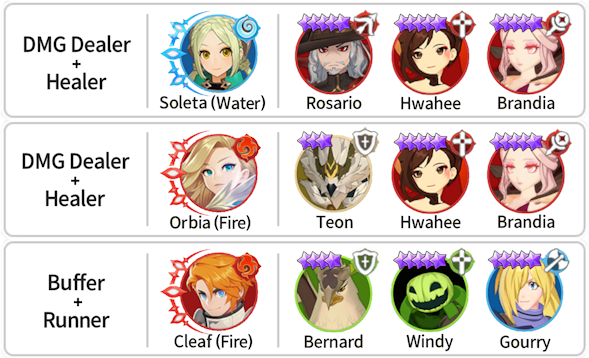
This team utilizes two roles:
- Damage dealer + healer:
- • Their main role is to deal damage, with the occasional healing / buffing / debuffing.
- Buffer + Runner:
- • Their main role is to buff MOV SPD UP and to do the running work.
- • Soul link Remy / Bernard, since it is more comfortable to dodge at Lv. 6+ MOV SPD UP.
- • The runner will be the one to pick up the Celestial Blessing orb (in Section 4 > Debuff: Abyss) and to clear the mobs in Phase 2: Shield (more in Section 5 > Phase 2).
- • Cleaf is good for this role since he has provoke.
Section 4: Abysis’ Usual Skills
This section lists all the skills Abysis will use in all phases (except Phase 5: Radiance Spear).
Note: The skill names listed below are mostly guesses based on the in-game skill names / icons and may be incorrect.
Debuff: Abyss
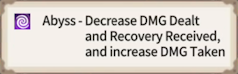
While technically not a skill, this notable debuff deserves its own subsection.
Each of Abysis’ skills will inflict Lv 1 Abyss debuff, and it is also inflicted for every hit of the following skill effect:
- • DMG based on no. of harmful effect (e.g. Wind Vampire Argen)
- • DMG mitigation ignoring DMG (e.g. Fire Phoenix Perna)
What to do:
Do your best to avoid Abysis’ skills, as this debuff is detrimental at higher stacks!
(e.g. Lv 9 Abyss means you only heal for 1 HP and are more likely to die with the next skill. Ouch!)
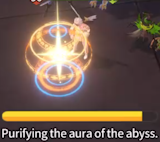
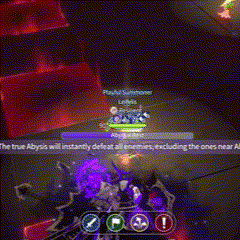
It can only be cleansed with Celestial Blessing.
“Archmage Lea’s message: Celestial Blessing has appeared. It will help with the battle in the abyss.”
The Celestial Blessing orb occasionally appears in the arena. It should be the runner's job to pick it up.
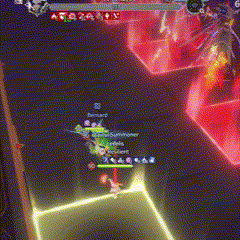
Red Squares
(No idea what it's called in-game)
A row of floor tiles will light up red, followed by the next row and the next until it reaches the other end. This will keep happening throughout the battle.
If touched, the squares will deal damage, remove all beneficial effects, add Lv 1 Abyss debuff and reduce Ultimate Gauge by about 10%.
What to do:
Go around them. By themselves they’re not too difficult to avoid, but what makes it tricky is that they’re usually happening while Abysis is using her skills. Turning your screen around to keep the red squares in the distance in front should make it easier.
Also, do note that Monsters sometimes like to spread out while walking and might be hit.

Basic Attack
Abysis raises a hand to her shoulder and shoots a dark purple ray in a straight line.
What to do:
This skill doesn’t do much damage, so most of the time it’s not necessary to dodge.

Dark Ray
Abysis brings her hands together, pauses and shoots 3 waves of dark purple rays in a cone shape in front of her.
If hit, the rays push the target(s) back.
What to do:
Move to her side / back when you see her bringing both hands together.

Gravity
Abyss raises one hand and a large cross of purple cubes slams down.
What to do:
Avoid the shadow on the floor.

Explosion
A large circle appears as Abysis jumps into the air and lands, exploding black mist around her.
What to do:
Run out of the circle.

Shock Wave
Multiple small circles appear on the floor, after which they explode.
What to do:
Avoid the circles.

Dark Strike
Floating purple cubes form a circling ring around Abysis, lasting about 10 seconds.
A white-purple vortex appears and explodes after some time, for a total of 3. This explosion will remove all beneficial effects.
What to do:
2 options here:
- • Stay inside the circle and avoid the white-purple explosions while dealing damage.
- • Stay outside the circle and wait for it to disappear (but you won’t be dealing damage).

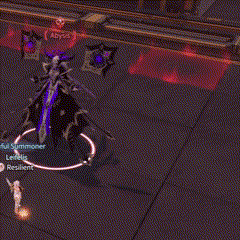
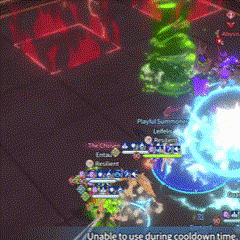
Dark Storm

Black Hole
*Note: This only happens when a skill with Ultimate Gauge UP effect is used. Abysis doesn’t use these skills normally.
A large circle appears and explodes, then Abysis summons a black hole that constantly pulls, making it significantly harder to dodge.
What to do:
Don’t use any skills with Ultimate Gauge UP.
Section 5: Fighting Abysis
There are 5 phases in this raid. Buckle in because Abysis has more than 42 million HP, it’s going to be a long one!
Phase 1: Meteor
Abysis uses her usual skills listed in the previous section until she reaches approximately 85% HP remaining, after which she triggers the skill Great Explosion.
Note: It may be prudent to save your Ultimate Skill for Phase 2: Shield.

Great Explosion
“Archmage Lea’s message: I can feel a massive dark aura. Protect it with the power of light!”
- Abysis teleports to the middle of the arena and designates a random Summoner as the target, denoted by a small red star on the Summoner. The edges of the target Summoner’s screen turn dark purple.
- On one corner of the map, a square tile shines yellow – the first Summoner that enters this light will obtain an invulnerability shield.
- After some time, Abysis drops a meteor on the target Summoner, which, due to the huge range, will obliterate everything in the whole arena unless positioned right at the corner of the map.
What to do:
- The targeted Summoner should run to the square light for the shield and stand at the nearest arena corner. Don’t move until the red indicator starts spreading on the floor!
- The other two should run to the opposite end of the square light – there should be just enough space to dodge the red squares if they’re nearby.
Phase 2: Shield
Abysis continues on with her usual skills until she reaches approximately 70% HP remaining, after which she will trigger the skill Destruction.
Note: It may be prudent to save your Ultimate Skill for the shield phase.

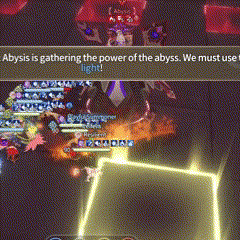
Destruction
“Archmage Lea’s message: Abysis is gathering the power of the abyss. We must use the power of light!”
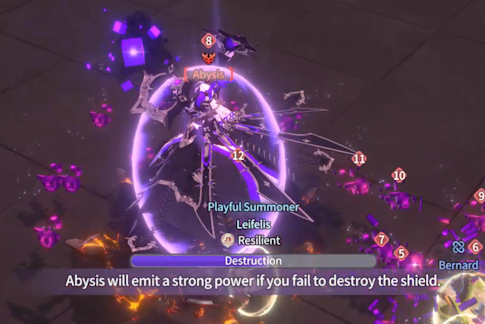
- Abysis teleports to the middle of the arena and surrounds herself in a purple shield, which is only removable when enough damage is dealt.
- A square of yellow light appears – the first Summoner that enters this light will obtain an invulnerability shield.
- A curved line of Dark Shard creatures appear on one side of Abysis. Touching them will deal high damage and debuff Fear. The Summoner + their Monsters with the invulnerability shield can defeat them by touching.
- A progress bar appears and will only stop when the shield is broken. If it fills up completely, she will obliterate everything in the arena, ending the raid.
- After some time, a second curved line of Dark Shards appears on the opposite side of Abysis.
What to do:
- Damage dealers:
- • Deal as much damage as possible to break the shield, while avoiding the Dark Shards.
- Runner:
- • Run to the square light for the shield and clear the first batch of Dark Shards.
- • Make sure to clear a space for the damage dealers to stand, then clear the second batch.
- • Once they’re all cleared, deal damage to Abysis if her shield is still not broken yet.
Phase 3: Darkness
In addition to her usual skills, Abysis starts to use these 2 new skills:

Gravitation
A large circle appears around Abysis, constantly pulling all Summoners, and explodes.
What to do:
Run and evade out of the circle!

Repulsion
Abysis charges up a skill as a ring of floating cubes appears around her, constantly pushing Summoners outward, and the ring explodes.
What to do:
Depending on the Summoner and the red squares’ locations, there are 2 options:
- • Remain inside the inner circle with Abysis against the push.
- • Use the push momentum to run out of the circle.
She also stops using Explosion at this point.
(In case you've forgotten, it's the one where she jumps and lands with an explosion around her.)
Once she reaches approximately 40% HP remaining, she will trigger the skill Abyssal Rest.

Abyssal Rest
“Archmage Lea’s message: Abysis is hiding in the great abyss. I’ll give you the power to see through the abyss, so find Abysis quickly.”
- Abysis teleports to the middle of the arena and turns the whole arena dark.
- She creates 2 copies of herself. The locations of all 3 of them can be seen briefly before they disappear.
- A spotlight appears on each Summoner, which will reveal Abysis or her clones if they’re inside.
- A progress bar appears and once it fills up, Abysis will obliterate everything in the arena except for a small area around her true body.
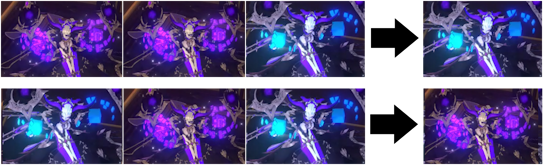
- The true Abysis is the one that is holding a different colored cube from her clones.
- • e.g. 2 purple + 1 blue = blue
- • e.g. 2 blue + 1 purple = purple
- Abysis repeats the whole process again, and after that she stops moving for a while, making it easy to deal damage to her.
What to do:
- First, move to the edge of the arena and turn the screen around to have a view of the whole arena. Take note of the locations of Abysis and her clones before they disappear.
- Spread out to each of the locations and light up Abysis. Take note of the color of the cube in her hand.
- Run to the Abysis with the odd colored cube.
- Wait for the progress bar to fill up, dodge the red squares if there’s enough time, and make sure to remain on Abysis’ tile just as the bar fills up.
- Repeat this one more time, then deal as much damage as possible to Abysis!
Phase 4: Meteor 2
In addition to her usual skills and her new ones from the last phase, she has 1 new skill:

Doom
A large purple cone follows the target Summoner for a while before exploding.
What to do:
The targeted Summoner should move the cone away from the other two, wait for it to stop moving, then dodge before the explosion happens.
The other two should move away from the cone.
This phase continues until Abysis reaches approximately 20% HP remaining, after which she triggers the skill Great Explosion (Meteor) again. This is exactly the same as in Phase 1.
(Final) Phase 5: Radiance Spear
Abysis continues on with all of her skills until she reaches approximately 0% HP remaining, then a cutscene signifies the final phase!
“Archmage Lea’s message: Abysis is rampaging. Basic attacks seem ineffective. Defeat it using the Radiance Spear!”
Phase Breakdown:
- All Monsters are defeated. All Summoners' beneficial effects are removed and they are debuffed with Oblivion. All stacks of the Abyss debuff is retained.
- The edge of the arena is covered in purple flames, reducing it to 6 x 6 tiles, and being inside it will deal damage to the Summoner. The purple flames will keep expanding, gradually reducing the arena size.
- Abysis is now immune to all damage except for Radiance Spear, and 20 hits of it will defeat her.
- The Radiance Spear appears as a gathering node on the floor at the start of this phase. Once a Summoner picks it up, all Summoners’ basic attack turns into Radiance Spear, while all other skills are disabled.
Using the Radiance Spear:
- Press and hold the basic attack button, which will slow the Summoner down to a walk, and let go once a pillar of light shines down on them. This will fire a light spear a short distance in the direction they’re facing.
Abysis’ Skills:
- She will only use the following skills: Red Squares, Basic Attack, Dark Ray & Doom.
(In case you’ve forgotten, they’re: red squares across the map, a single ray, 3 waves of rays in a cone, and a large cone that explodes.)

Big Bang
- Abysis raises her hand, a sword stabs into the floor and a receding purple circle appears. Once the circle condenses into the sword, the arena explodes and can only be avoided by jumping. This happens 3 times in a row.
What to do:
- Once the first sword appears, stop charging the spear and prepare to jump. Jump when the circle almost touches the sword. Fire the spear only when she’s using the other skills!
Abysis’ Skill Cycle:
She has a pretty predictable move set at this stage.
- • Arena size is reduced to 6 x 6 tiles. She starts off with Big Bang, and then Dark Ray and Doom in any order.
- • After the 2nd Big Bang, the arena size is reduced to 4 x 4 tiles. She uses Dark Ray and Doom as usual, 3rd Big Bang, then Dark Ray / Doom.
- • Before the 4th Big Bang, the arena size is reduced to 2 x 2 tiles. This is the time to defeat her!
- • Shortly after the 5th Big Bang, the arena is completely covered by purple flames, which means the raid will end in defeat.
If you’ve reached this point, congrats! Take a break, do a little happy dance and have some coffee / tea / soda / etc. You deserved it!
And do let me know if this guide helped you. :D
Have fun!
~Leifelis
- 3 0 7,939
0/3000